Link to this article: How to Move a Vehicle from One Customer to Another
When a vehicle changes ownership (such as when a car is sold to another customer or transferred within a family), you can easily update its records in DRIVE SMS. Following this process ensures that the vehicle's history remains intact while associating future Repair Orders with the correct customer contact.
Step 1: Locate and Edit the Vehicle
Navigate to the Customers menu in the left-hand sidebar of the SMS.
Select the Vehicles tab at the top of the screen.
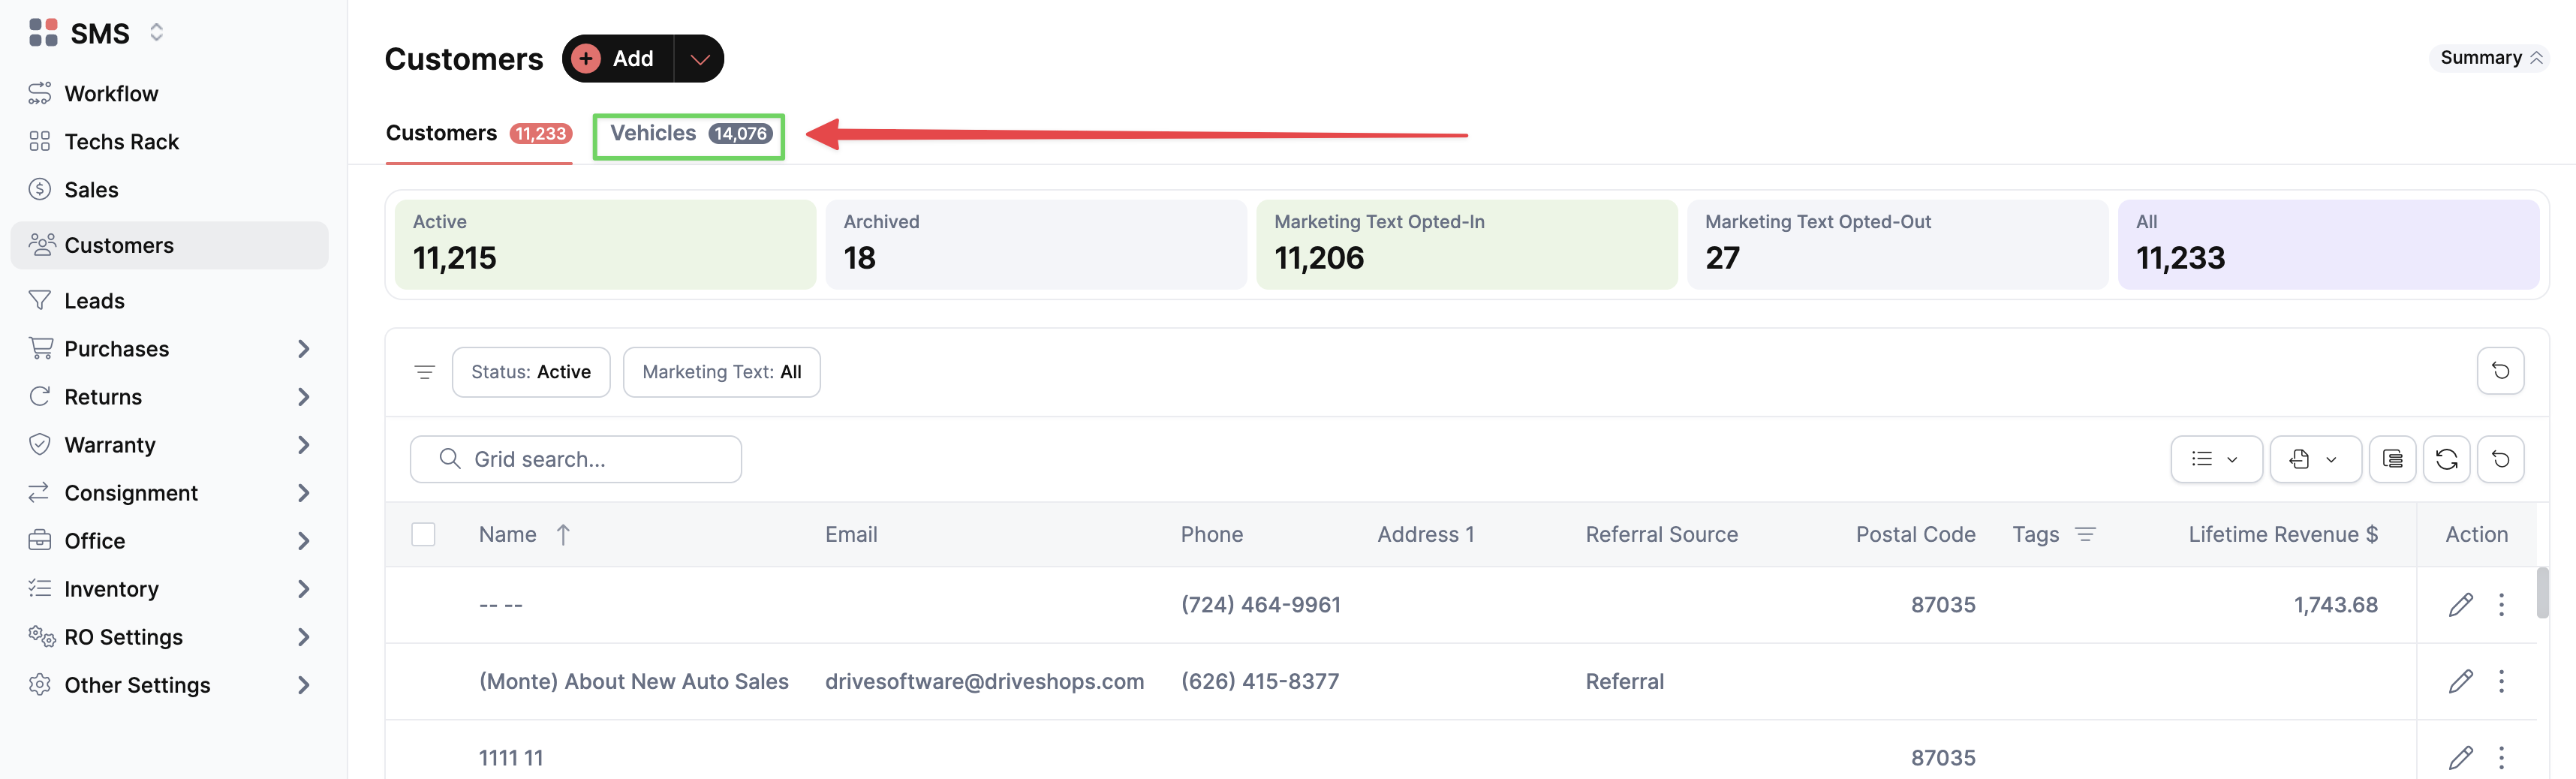
Search for the vehicle using the search bar (you can search by License Plate, VIN, or the current owner's name.) Click the Pencil (Edit) icon under the Action column for the vehicle.
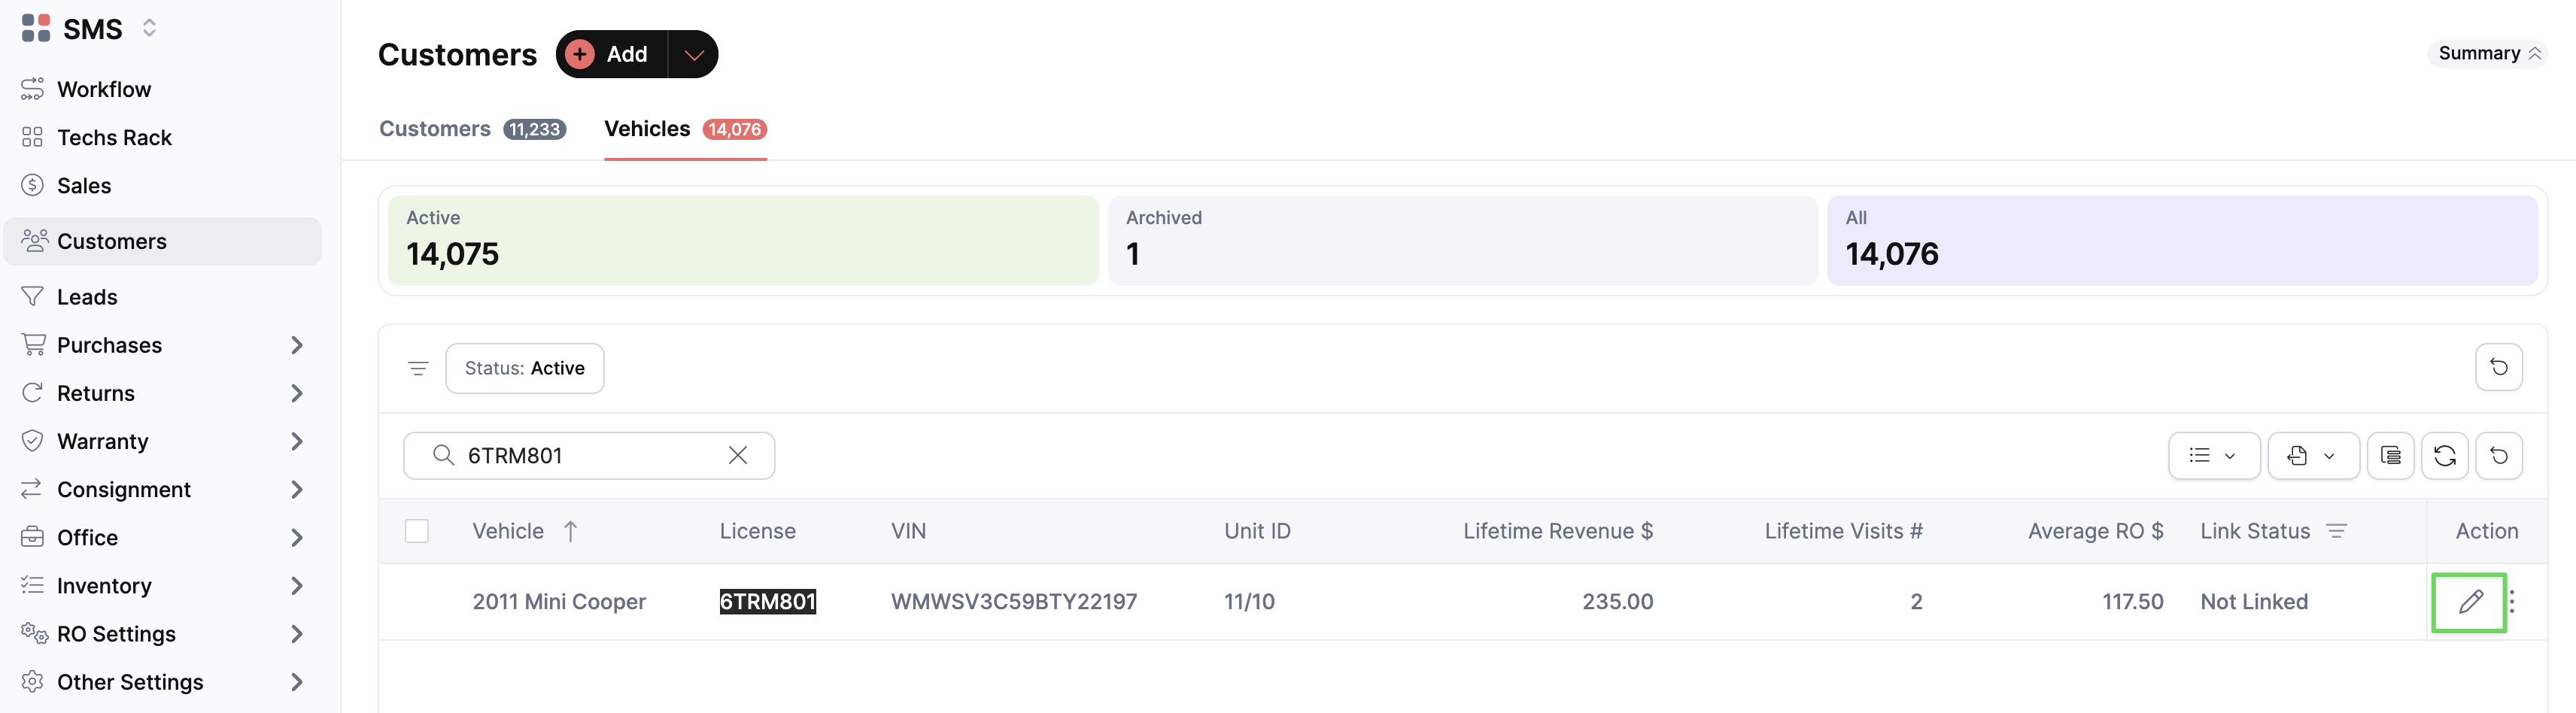
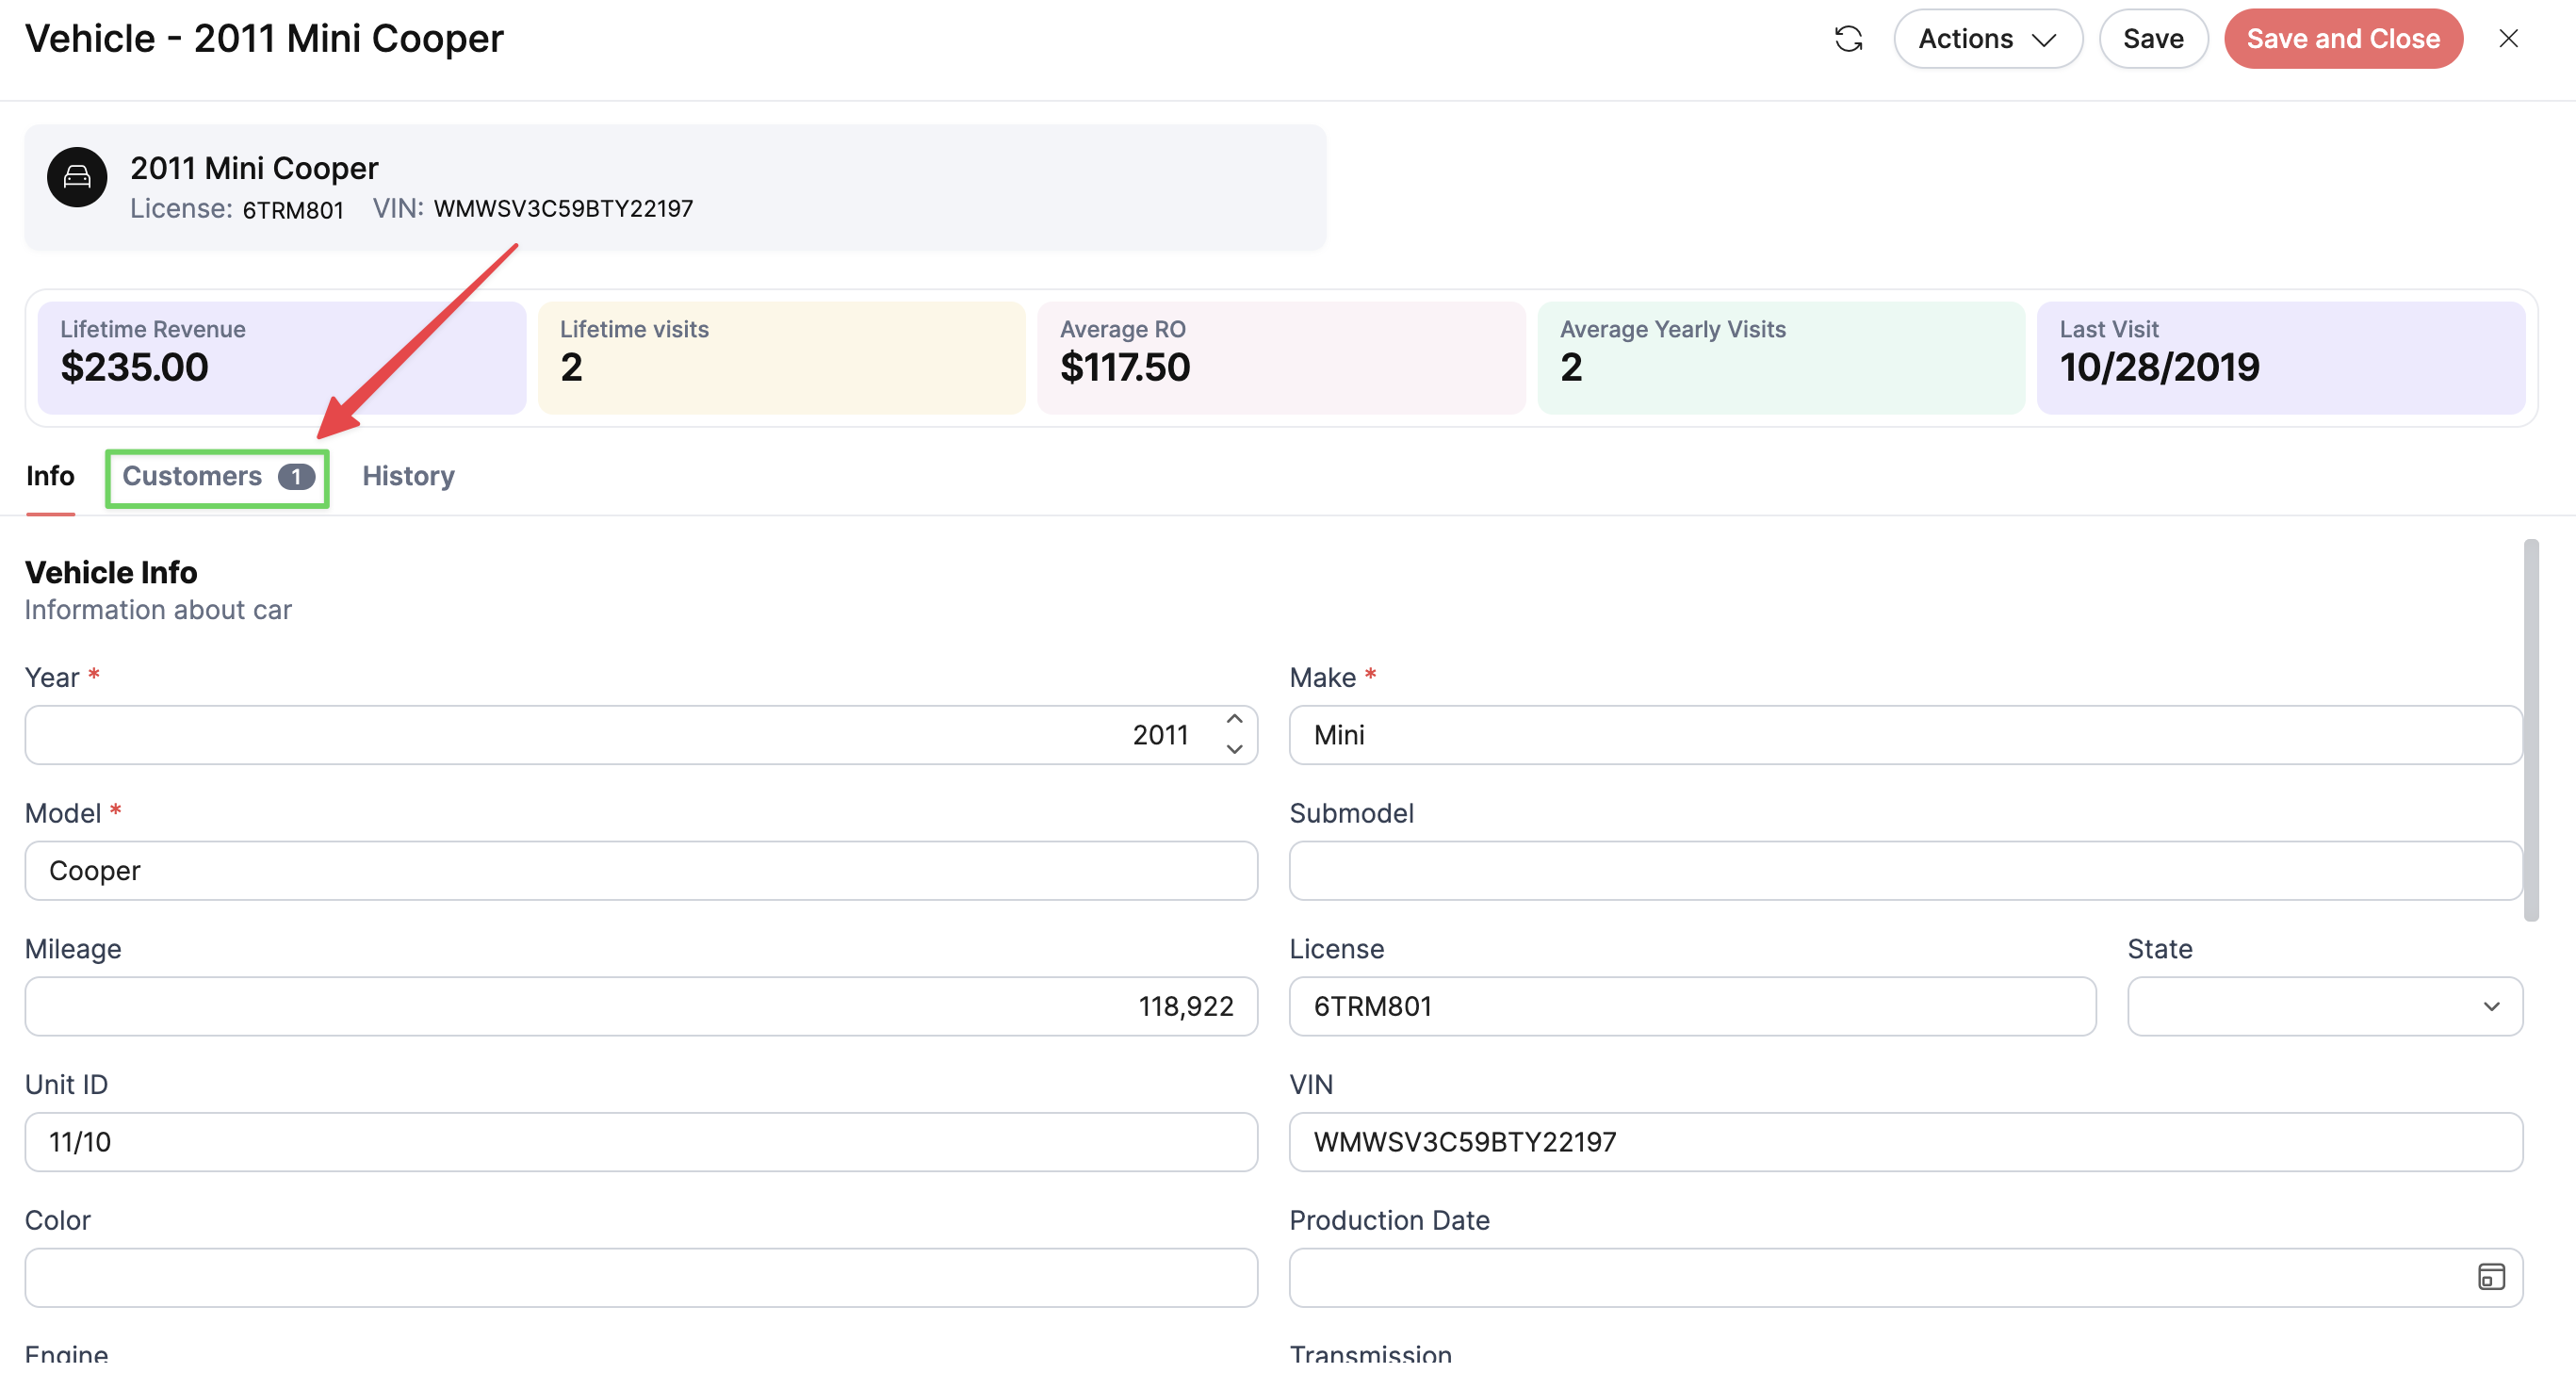
Step 2: Access the Vehicle's Customers Tab
Click on the Customers tab. This section displays all Linked Contacts who currently have a relationship with this vehicle.
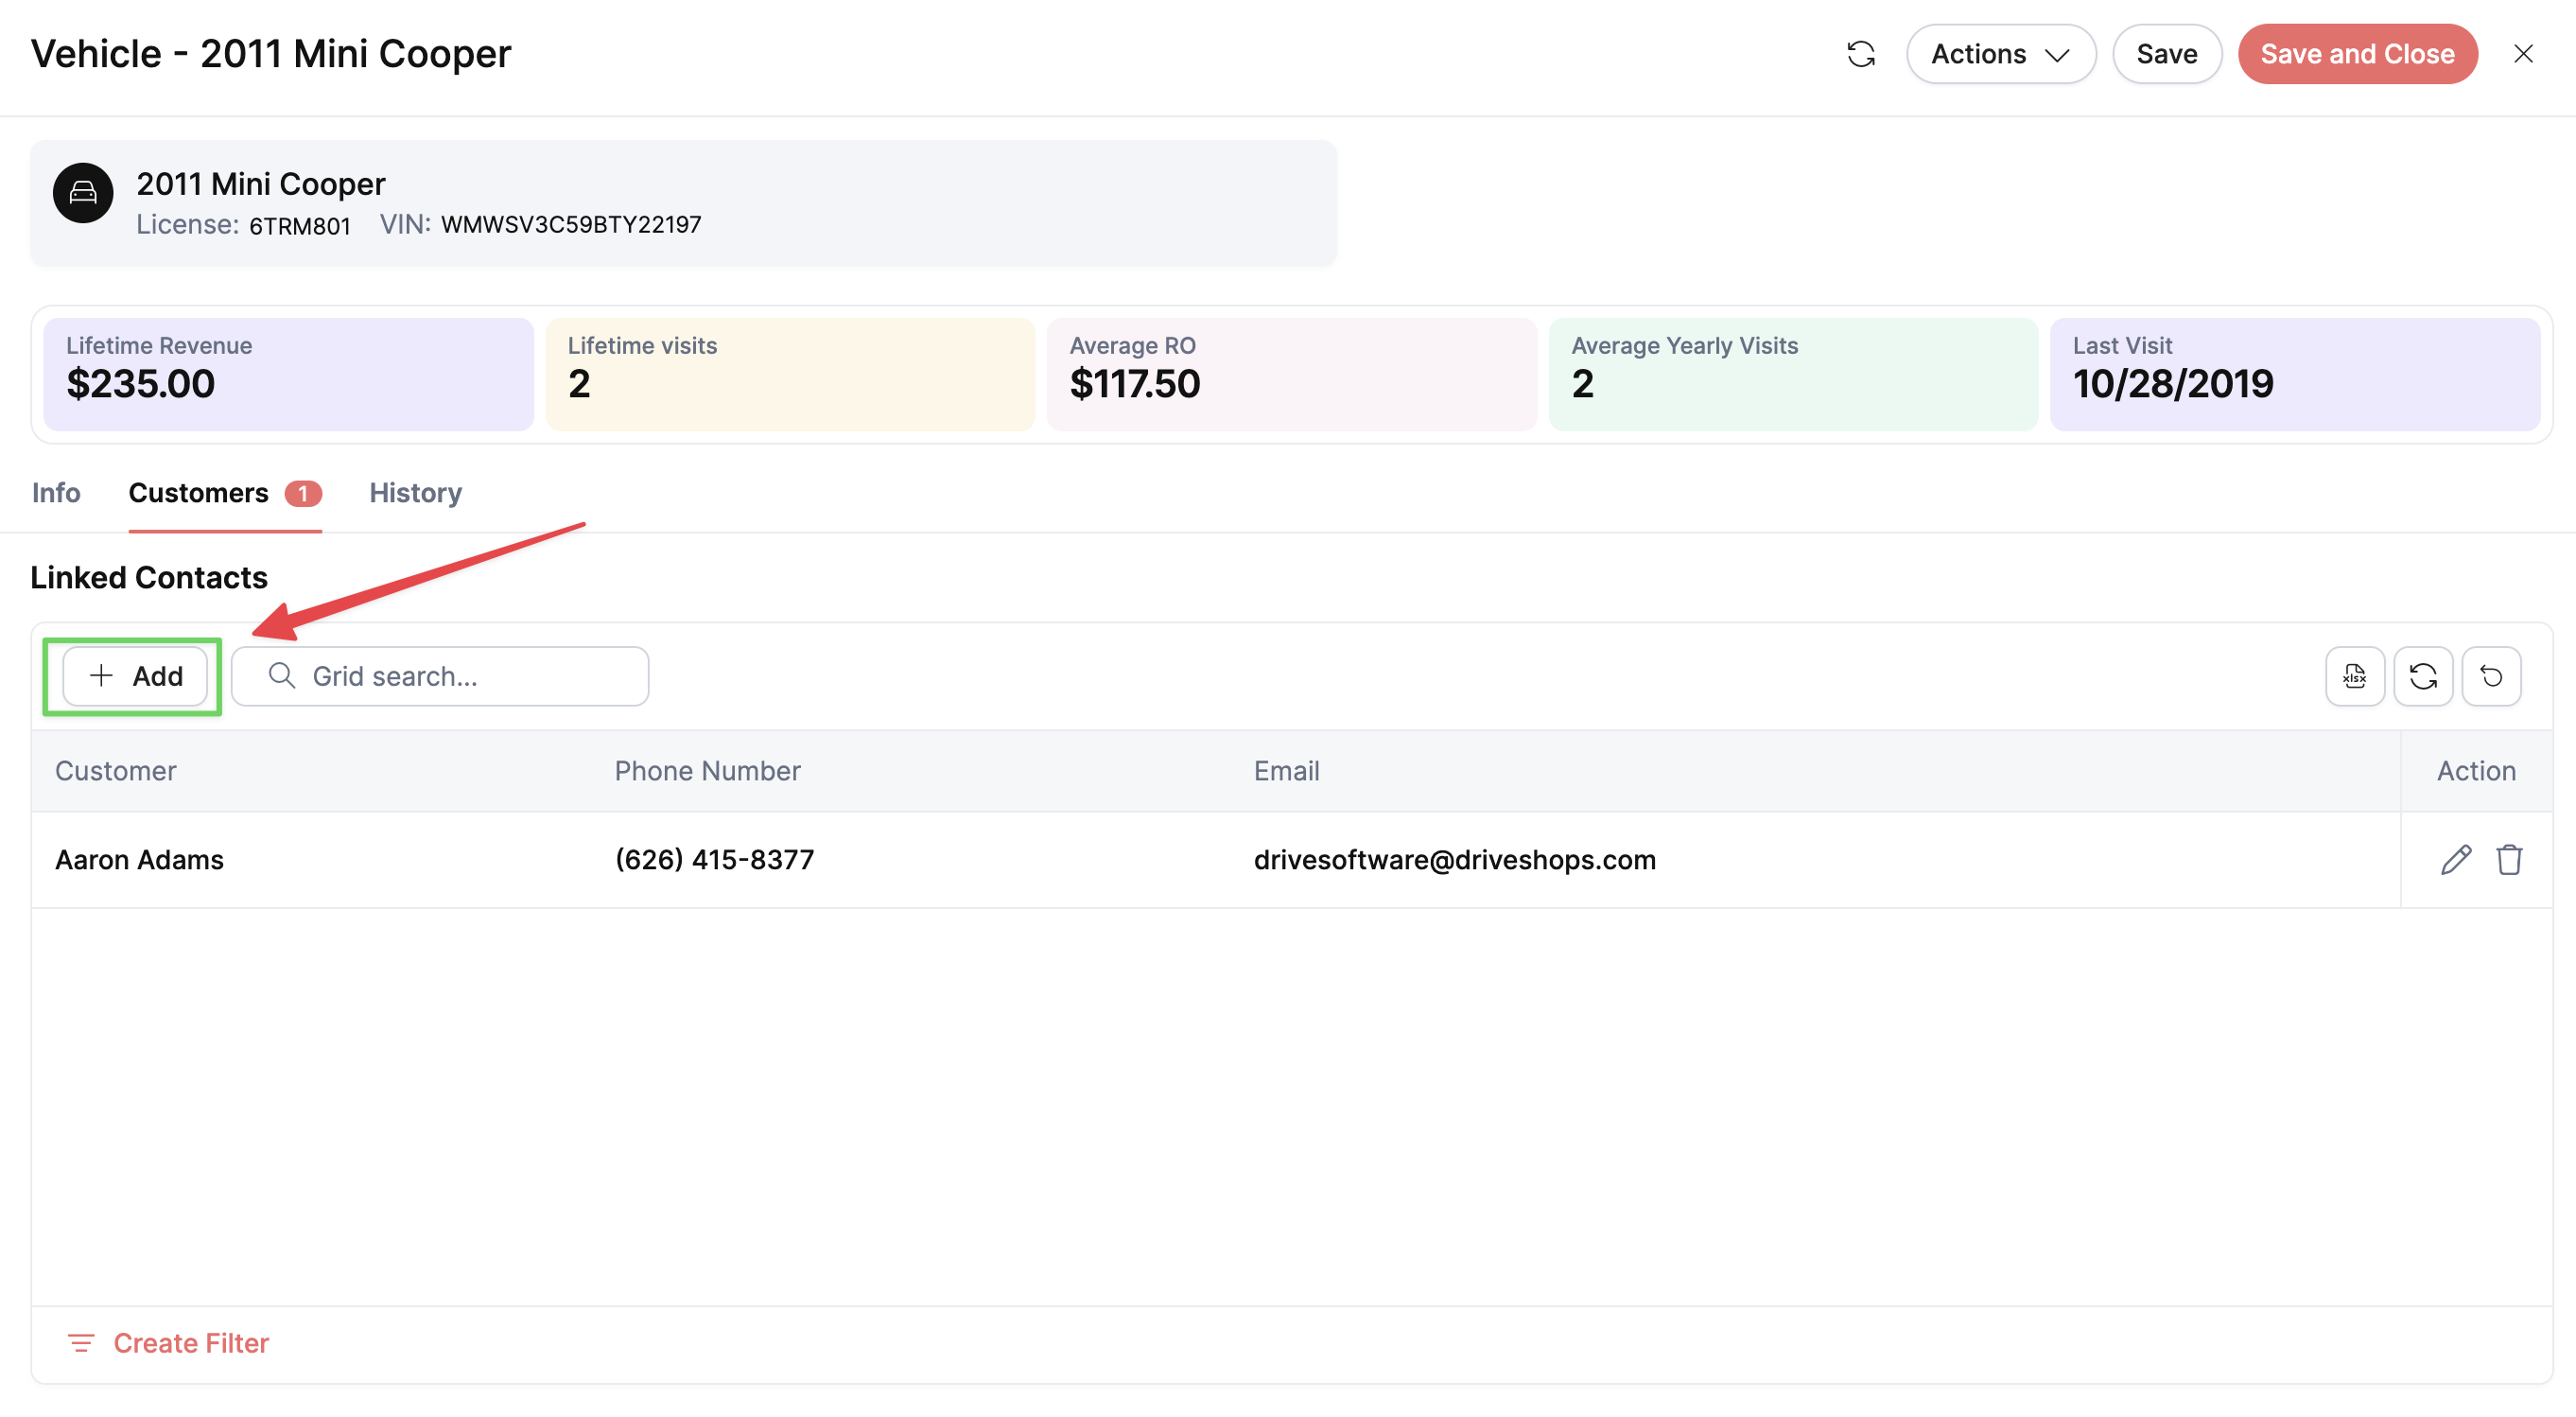
Step 3: Link the New Customer
Click the + Add button located directly above the Linked Contacts grid.
In the Contact window that pops up, select the Add to existing customer radio button.
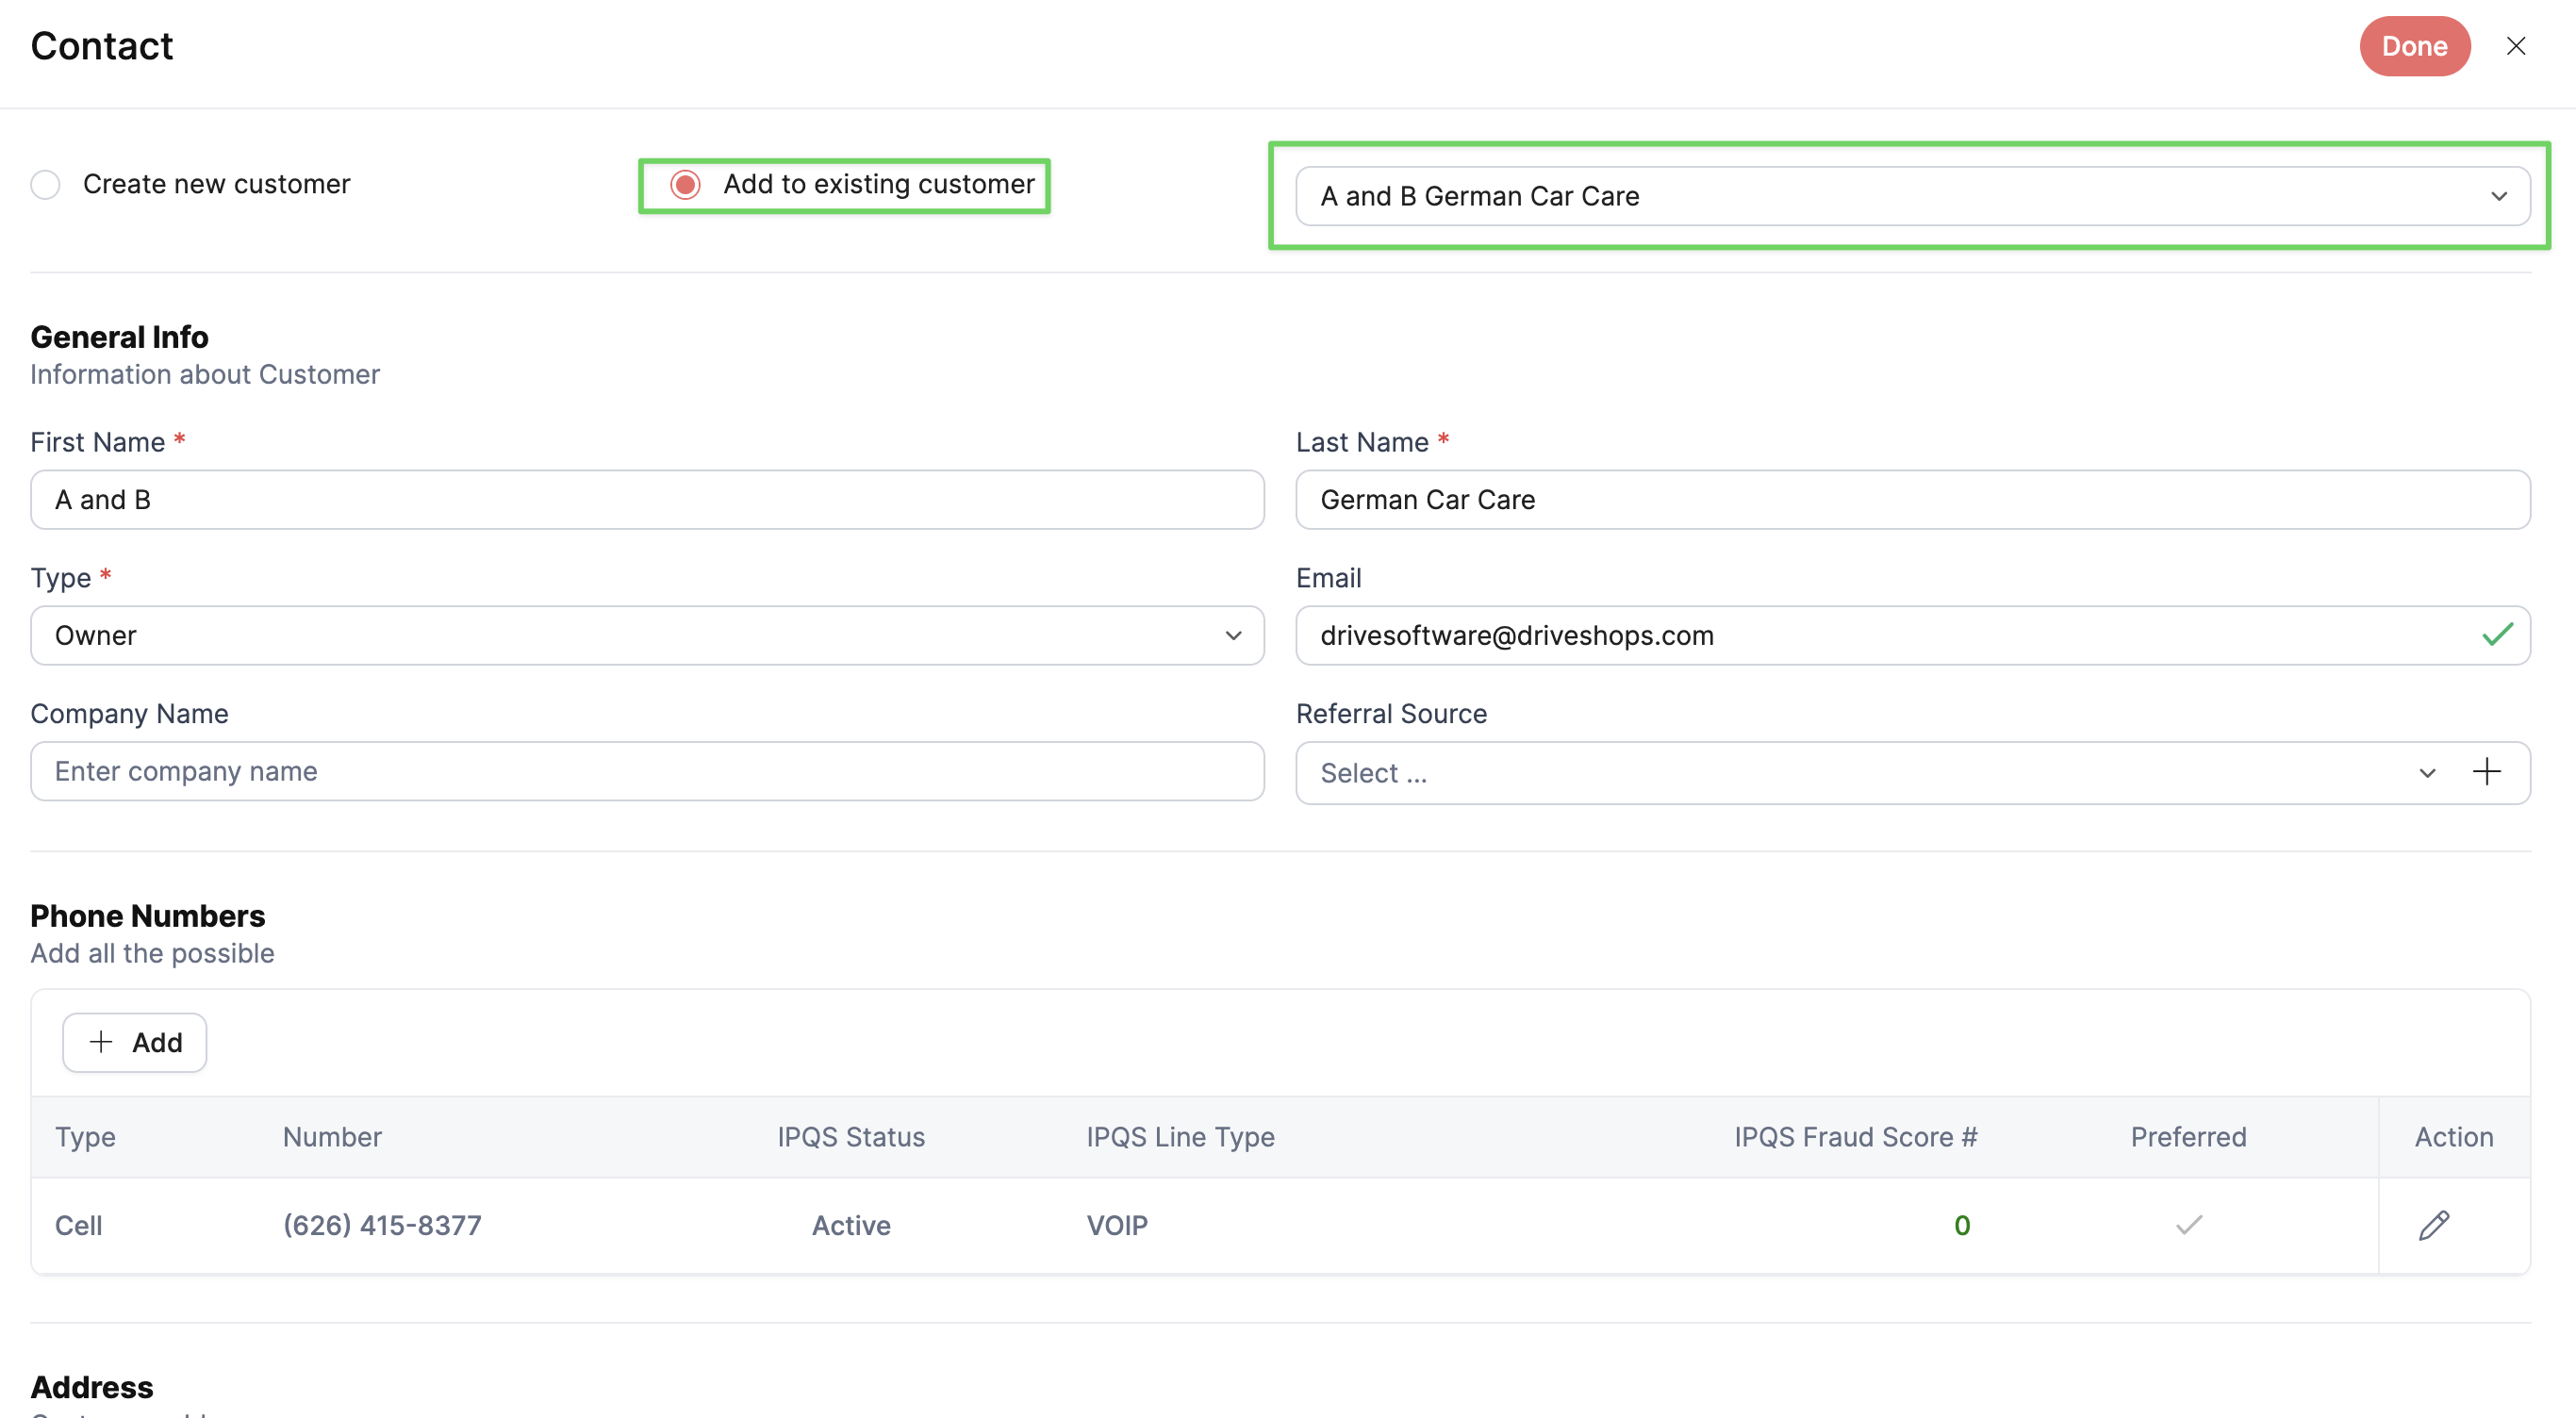
Click the dropdown menu next to it and select the customer you want to transfer the vehicle to.
Verify or fill in their contact details (First Name, Last Name, Email, and Phone Numbers).
Select the appropriate relationship from the Type dropdown (typically "Owner" for the new primary contact.)
Click the red Done button in the upper-right corner of the Contact drawer to save the new link.
Step 4: Remove the Previous Customer Link
Back on the vehicle's Customers tab, you will now see both the old and new customers listed under Linked Contacts.
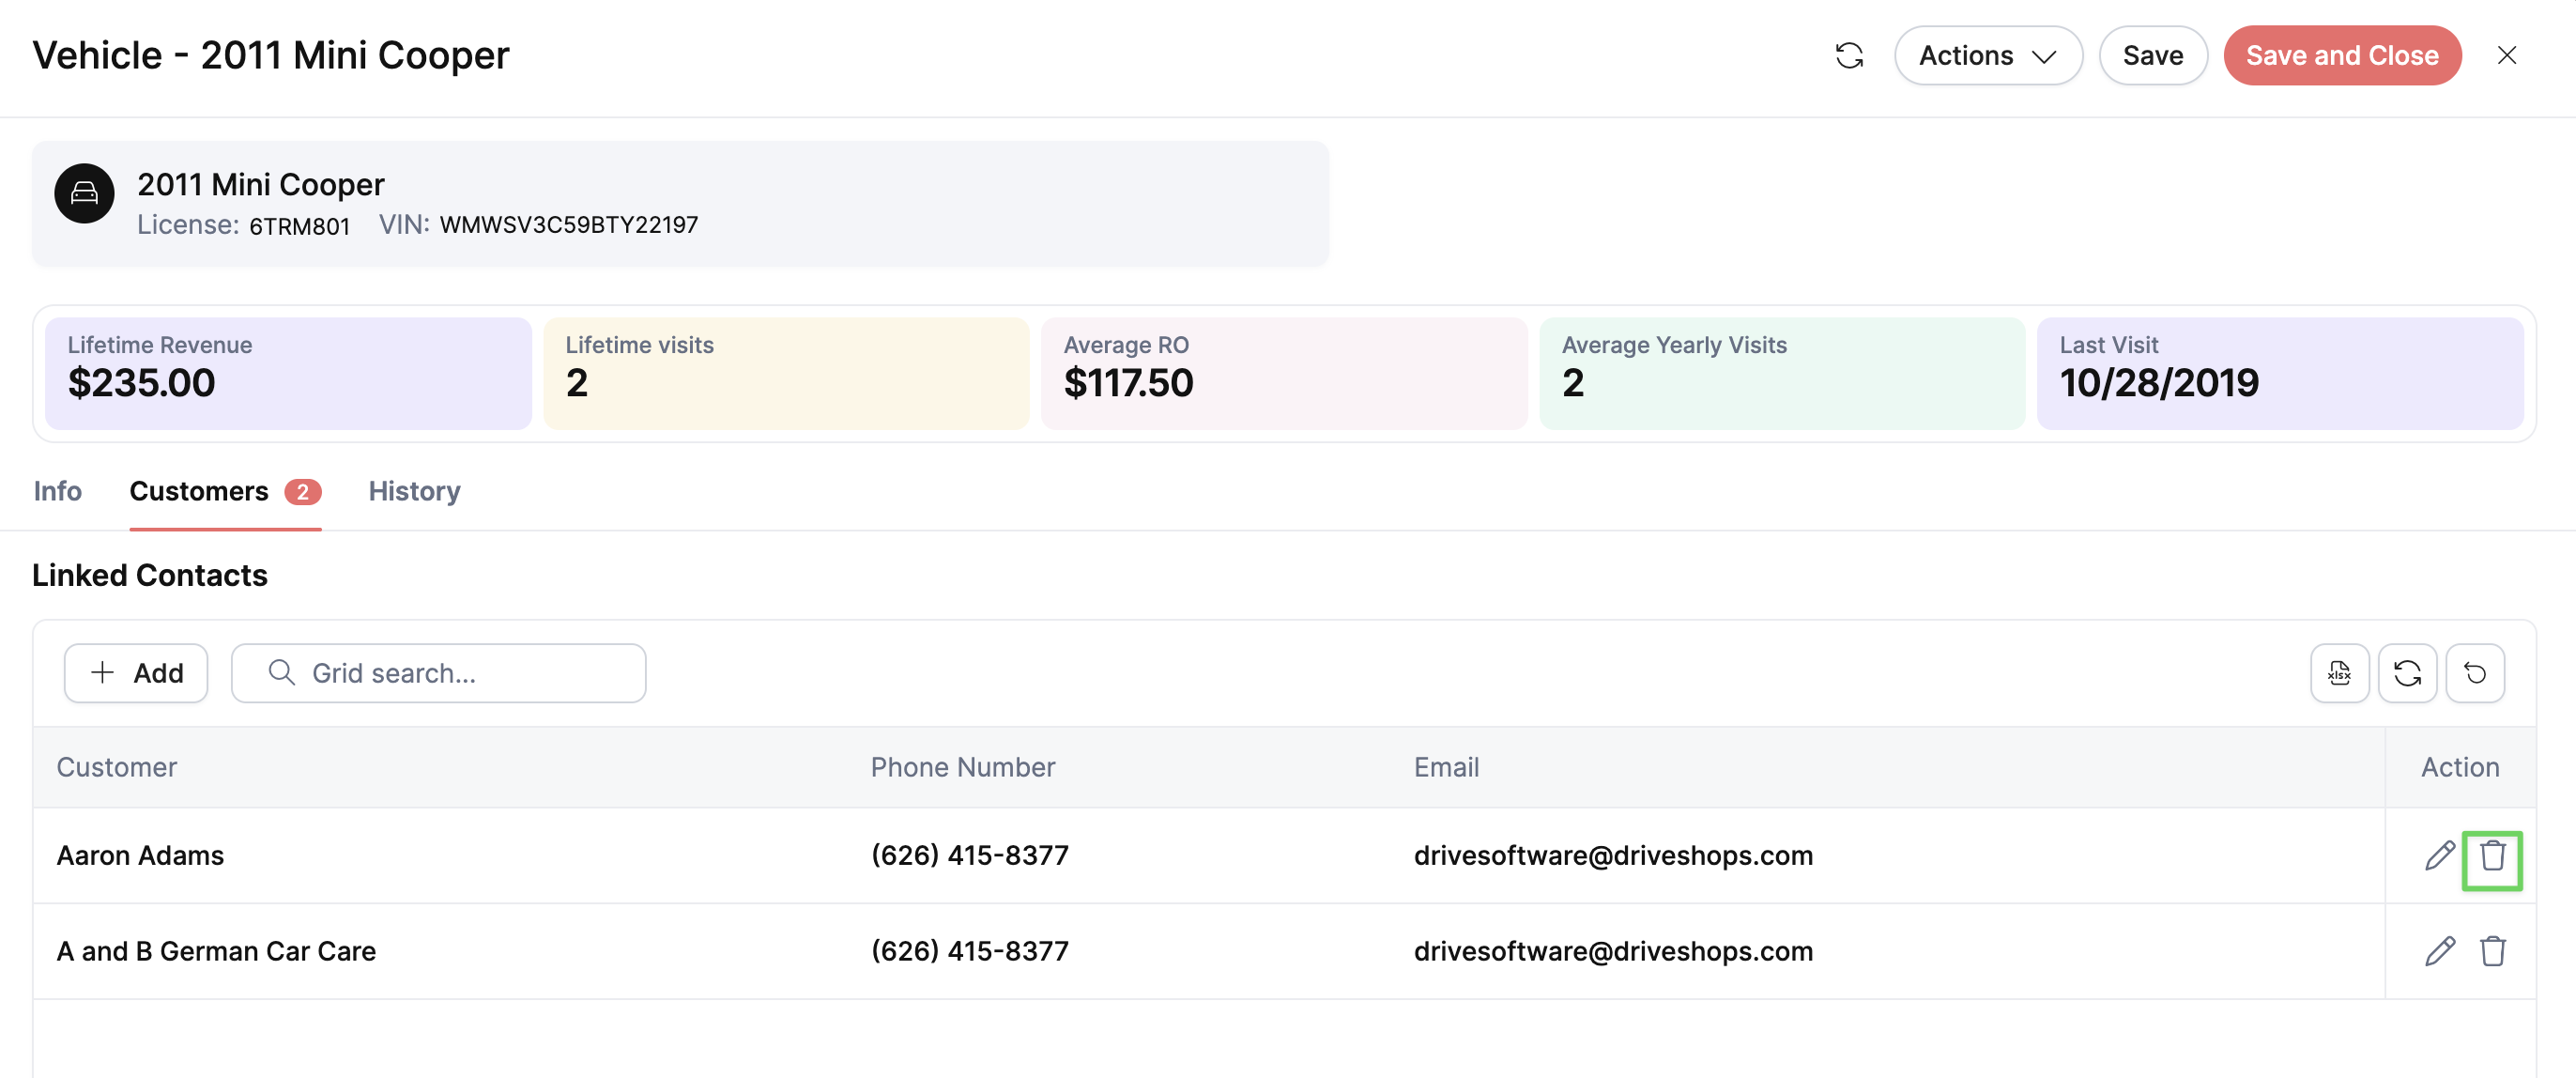
Find the previous customer's name in the grid and click the Trash Can (Delete) icon next to their name.
A Confirmation message will appear asking: "If you delete the record all data will be deleted permanently. Are you sure you want to delete?"
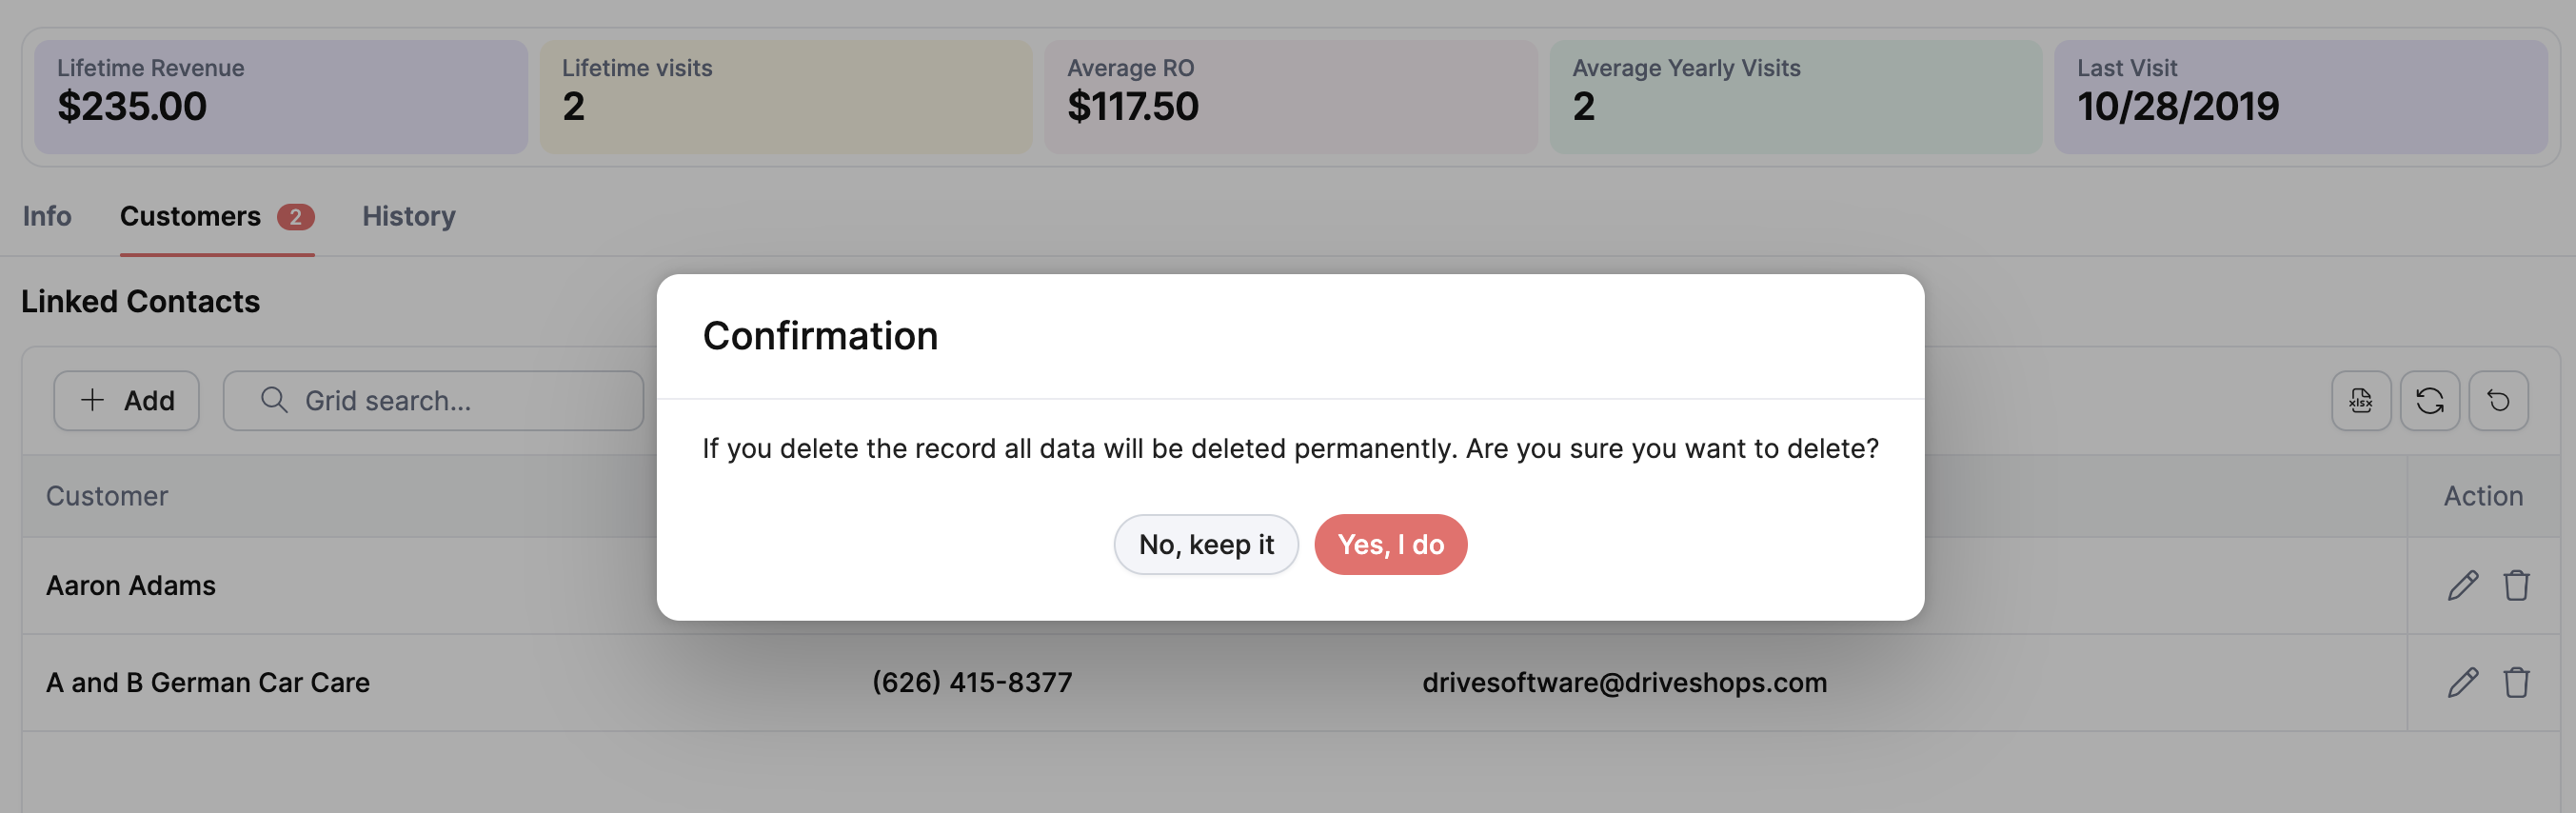
Click the red Yes, I do button to confirm the deletion.
Step 5: Save and Close
Verify that only the new customer remains in the Linked Contacts grid.
Click the red Save and Close button in the top-right corner of the vehicle drawer to finalize the ownership transfer.
Key Information to Keep in Mind:
Preserving Service History: Moving a vehicle to a new customer does not erase its past service records.
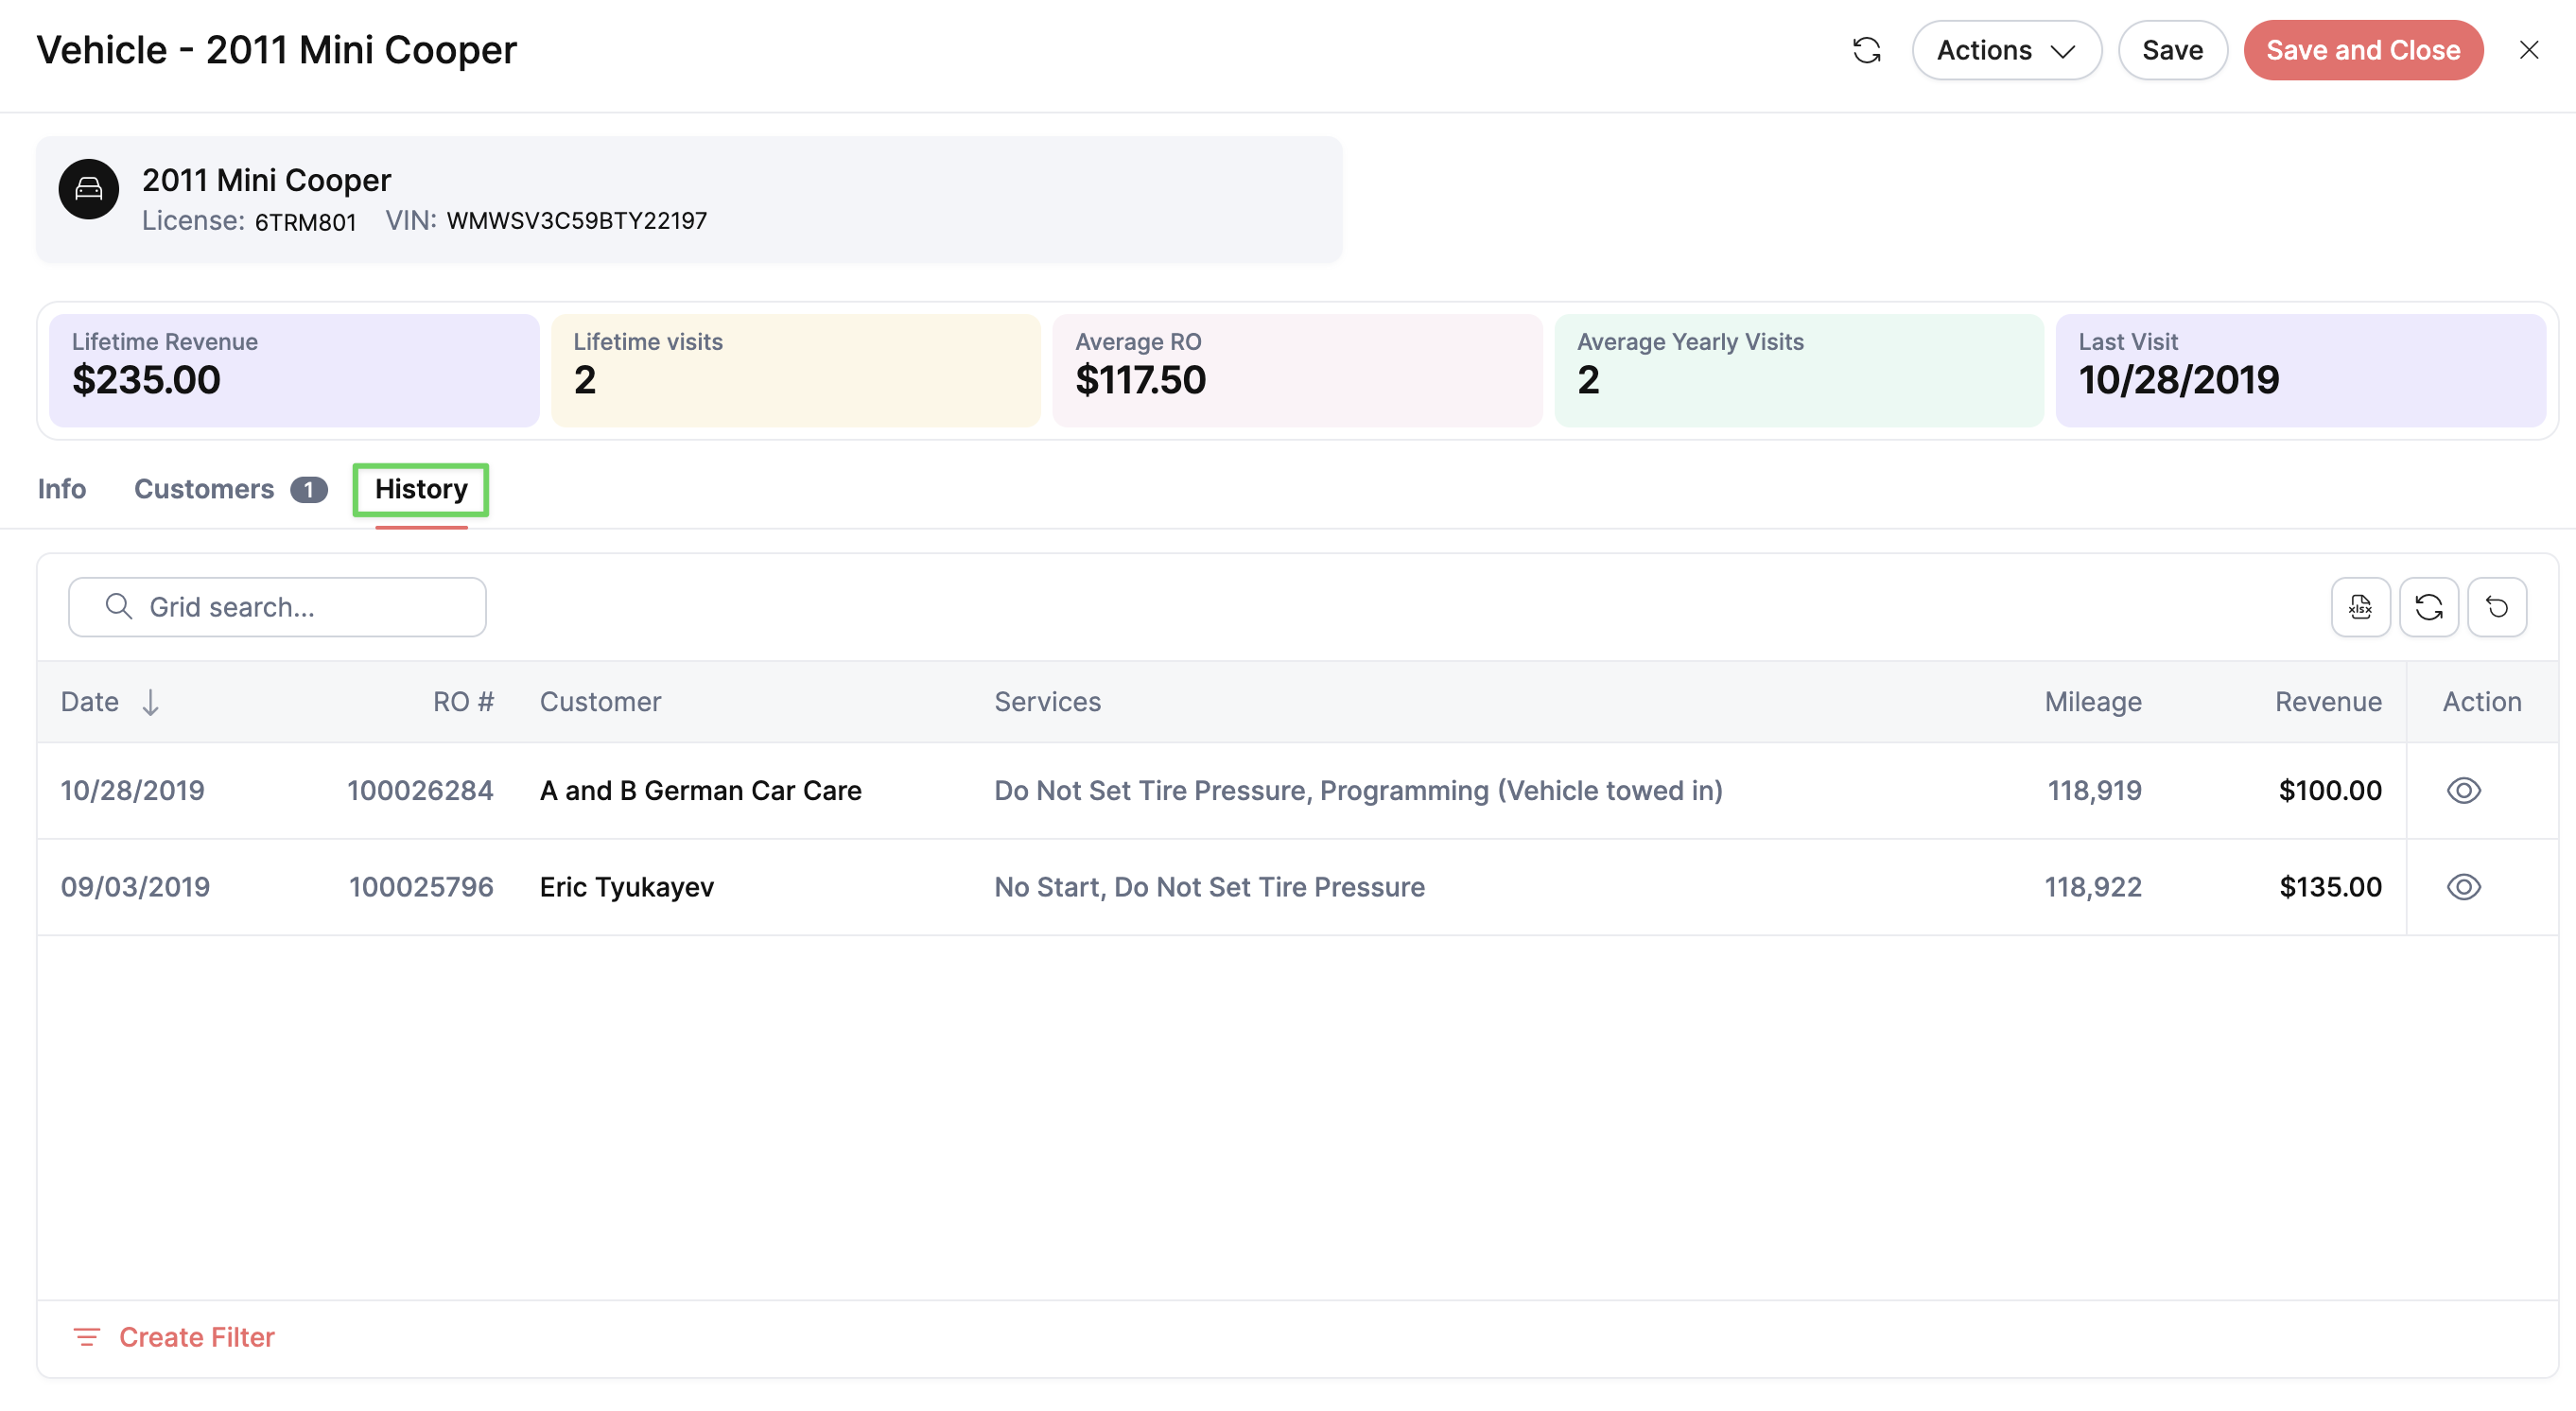
If you click on the History tab of the vehicle drawer, you will still see a comprehensive record of all past Repair Orders, including the names of the previous customers associated with those specific past visits.Multiple Contacts: If a vehicle is shared (e.g., between spouses or parent and child), you can keep multiple contacts linked to the vehicle. You can manage their relationship roles by setting their contact "Type" (e.g., Spouse, Driver, Daughter, etc.) instead of deleting them.
Was this article helpful?
That’s Great!
Thank you for your feedback
Sorry! We couldn't be helpful
Thank you for your feedback
Feedback sent
We appreciate your effort and will try to fix the article