Link to this article: How to Add "Out of Office" Time in the Scheduler
Adding Out of Office (OOO) time blocks ensures that team members cannot be scheduled for customer appointments or service work while unavailable. If an appointment is scheduled during an OOO block, the system will prevent it with an error: "Appointment is not allowed. The user is Out of Office. Please select another time."
Steps to Add Out of Office Time
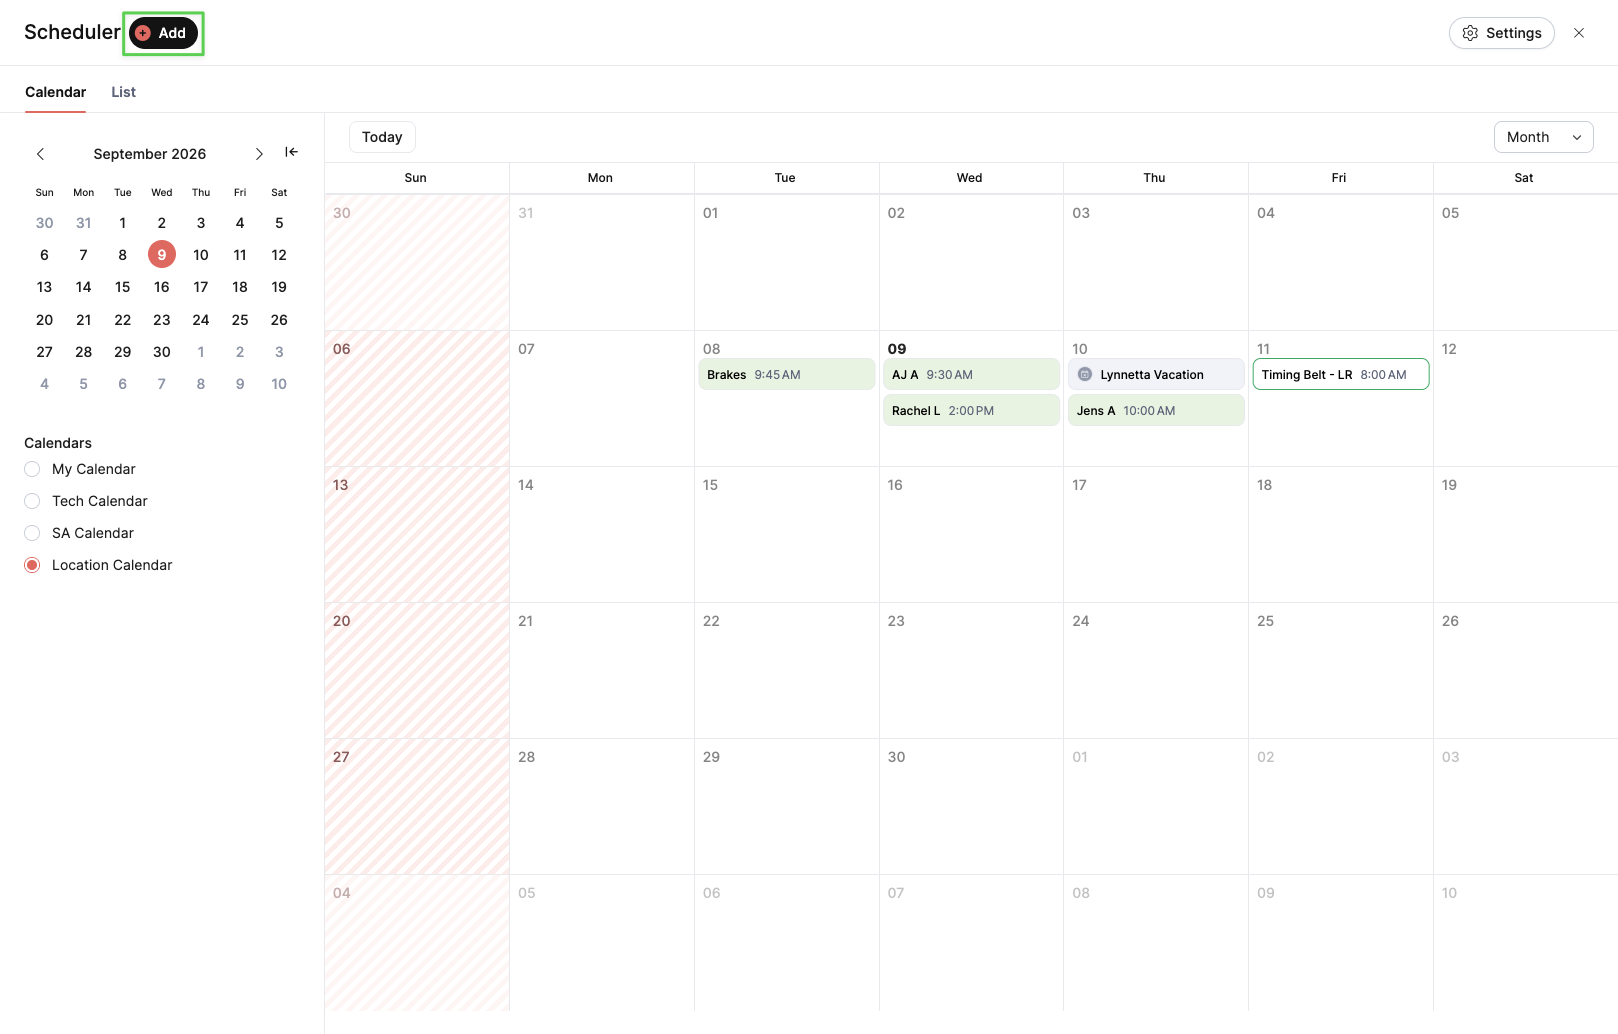
Open the Scheduler & Add Event
Navigate to the Scheduler screen.
Click the + Add button in the top left corner.
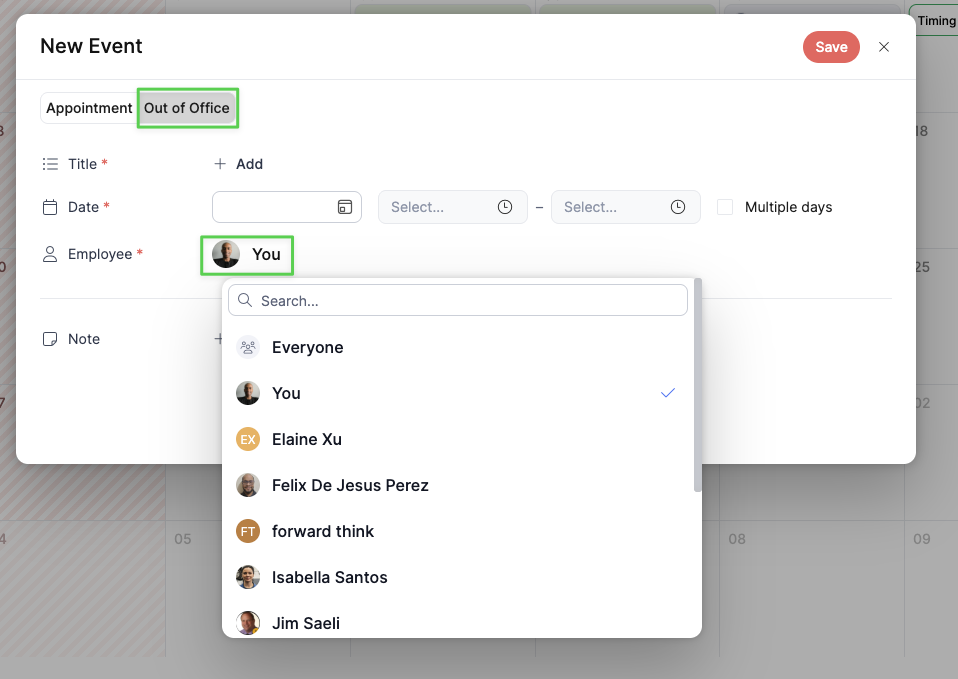
Select the Out of Office Tab
In the New Event screen, switch from the default Appointment tab to the Out of Office tab.
Enter Details & Assign Employee
Title (Optional): Enter a brief description (e.g., Vacation, Doctor Appointment).
Date & Time:
Select the date and time range for the absence.
Check Multiple days if the out-of-office period spans across more than one day.
Employee: Click the dropdown to select the specific employee or choose Everyone for company-wide time off.
Note (Optional): Add any additional notes regarding the absence.
Save the Event
Click the red Save button in the top right corner. The blocked time will now appear on the calendar.
Troubleshooting: "Appointment is not allowed. The user is Out of Office"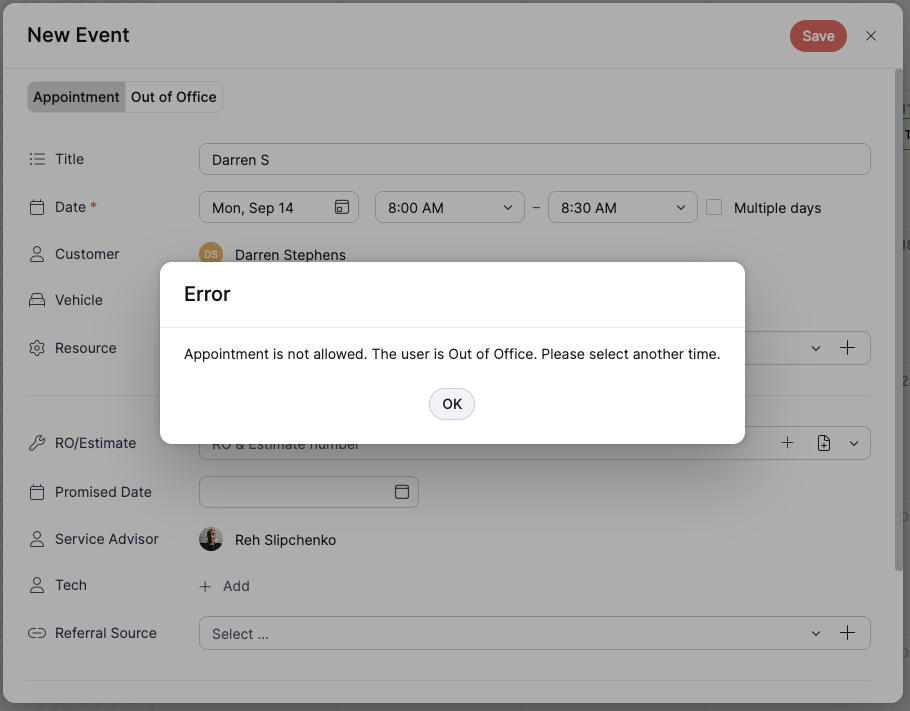
If you attempt to book a customer appointment for a Service Advisor or Technician who has scheduled Out of Office time, the system will block the save and display an error dialog:
Error: Appointment is not allowed. The user is Out of Office. Please select another time.
Resolution: Click OK, then either select a time slot outside the employee's out-of-office hours or assign a different available staff member to the appointment.
Was this article helpful?
That’s Great!
Thank you for your feedback
Sorry! We couldn't be helpful
Thank you for your feedback
Feedback sent
We appreciate your effort and will try to fix the article