Link to this article: Location Hours and Appointment Settings
Configure your shop's operating schedule, customer booking availability, and booking rules directly from the Other Settings menu.
Accessing Location & Appointment Settings
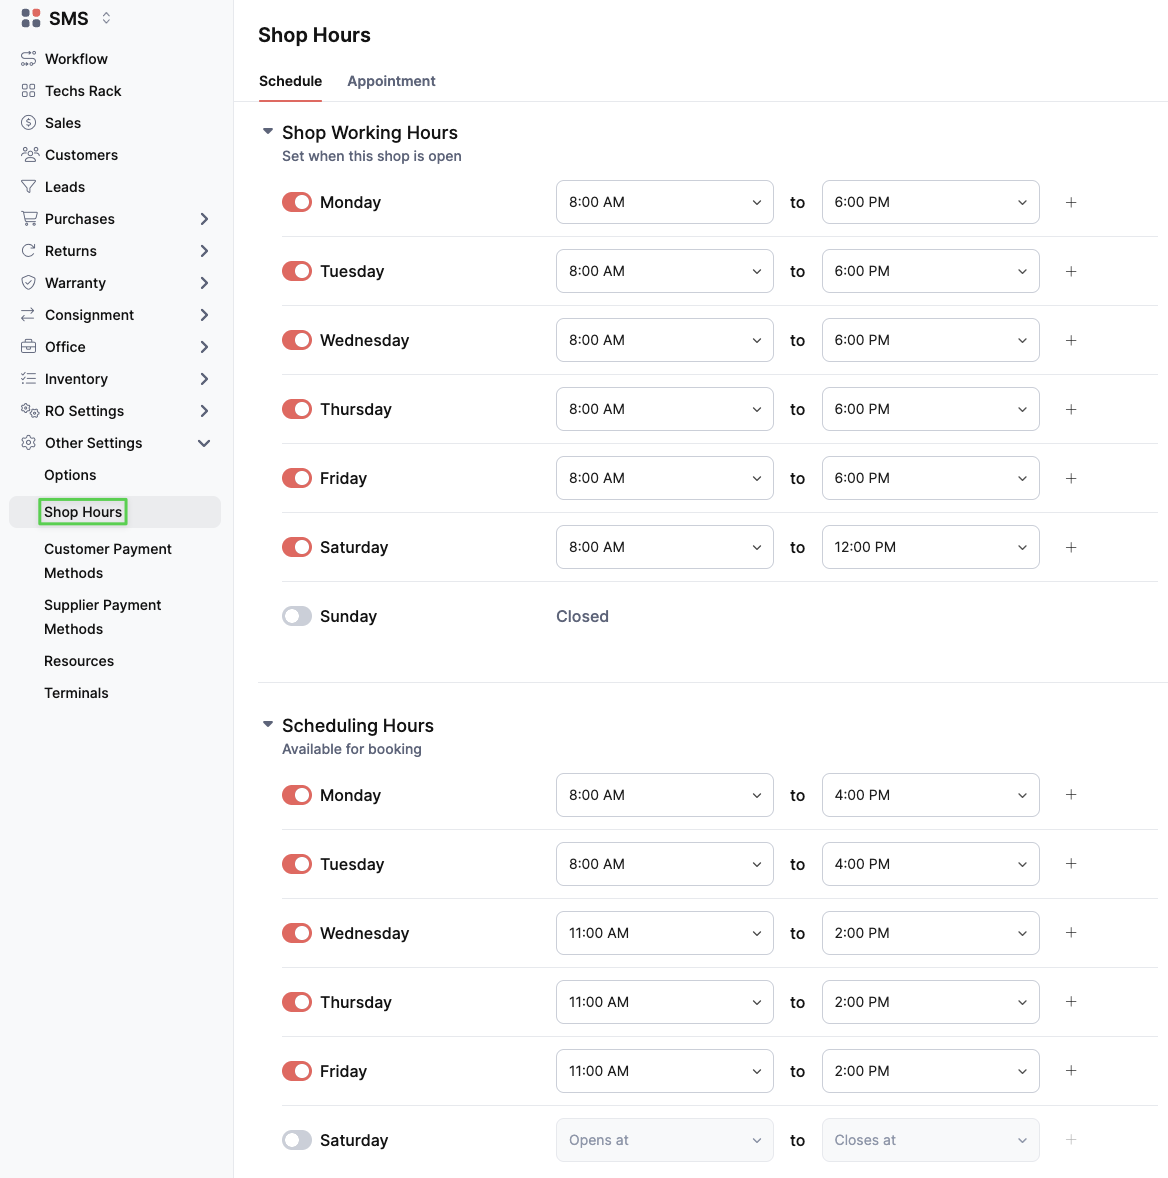
- In the left navigation menu of the SMS app, click to expand Other Settings.
- Select Shop Hours (or Location Hours).
Step 1: Set Location Hours (Schedule Tab)
From the Schedule tab, define your shop's operating availability across three sections:
- Shop Working Hours (Set when this shop is open):
- Toggle the switch next to each day of the week to mark the shop as open or closed.
- For open days, select the opening and closing times using the dropdown menus (e.g.,
8:00 AMto6:00 PM). - Click the + button if you need to add split shifts or multiple time blocks for a single day.
- Scheduling Hours (Available for booking):
- Set the specific time windows during which appointments can be booked by or for customers (e.g.,
8:00 AMto4:00 PMor11:00 AMto2:00 PM). - Use the toggle switches to enable or disable booking availability for specific days.
- Set the specific time windows during which appointments can be booked by or for customers (e.g.,
- Special Hours (Add holiday or special occasion hours to override regular schedule):
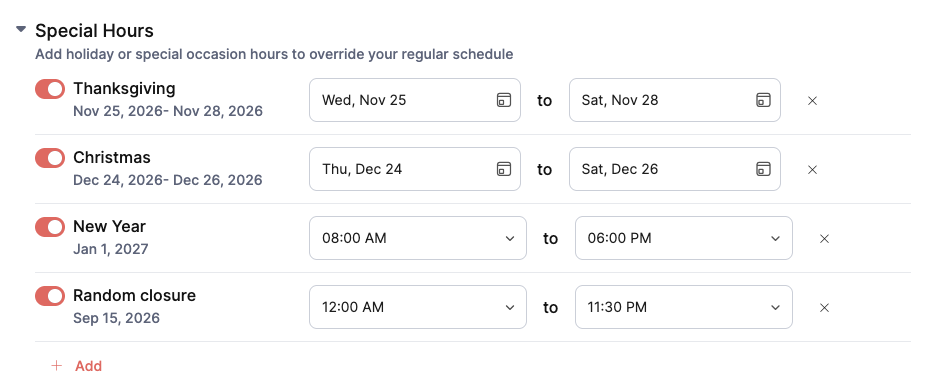
- Override regular hours for holidays or closures (e.g., Thanksgiving, Christmas, New Year, or custom closures).
- Use the toggle switches to activate pre-configured holidays and define the date/time range.
- Click + Add at the bottom of the section to introduce a new custom date override or closure.
Step 2: Adjust Appointment Settings (Appointment Tab)
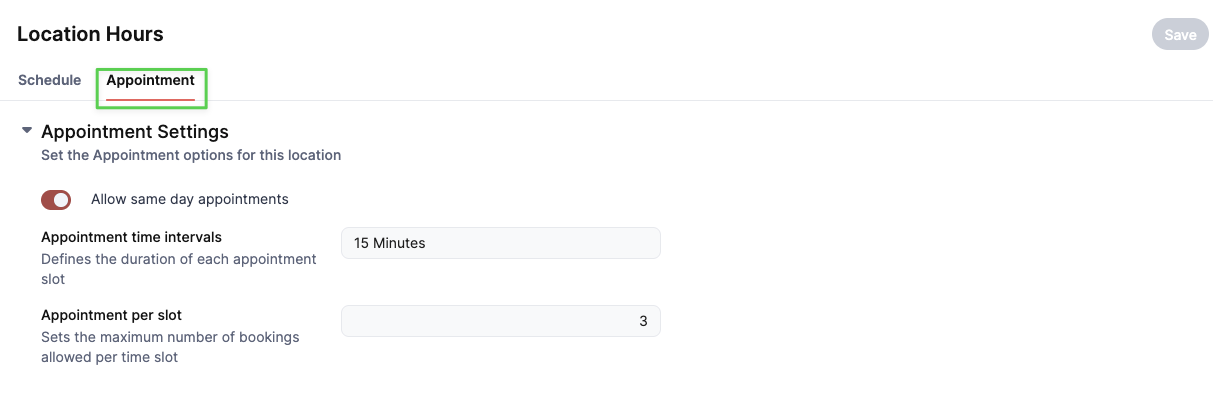
Click the Appointment tab at the top of the page to configure booking rules:
- Allow same day appointments: Toggle this switch on to permit customers to book appointments on the current date, or toggle off to require advance booking.
- Appointment time intervals: Click the dropdown to define the duration for each appointment slot (e.g.,
15 Minutes). - Appointment per slot: Set the maximum number of concurrent bookings allowed within the same time interval (e.g.,
3).
Step 3: Save Changes
Click the Save button in the upper-right corner of the screen to apply your updated hours and appointment rules.
Was this article helpful?
That’s Great!
Thank you for your feedback
Sorry! We couldn't be helpful
Thank you for your feedback
Feedback sent
We appreciate your effort and will try to fix the article